


Ever seen that dreaded message "Core Web Vitals Assessment Failed" flash across your screen? It's enough to send any website owner into a cold sweat. But fear not, website warrior! This guide will be your shining beacon in the darkness, leading you towards a website that's both speedy and satisfying for visitors.

Based on various available studies and reports, here's a general picture:
Around 50-60% of websites struggle with at least one aspect of Core Web Vitals, particularly First Input Delay (FID) and Cumulative Layout Shift (CLS).
Older websites are more likely to fail compared to newer ones built with Core Web Vitals in mind.
Mobile performance is often worse than desktop performance, with a higher percentage of websites failing Core Web Vitals on mobile devices.
First things first, what are Core Web Vitals?
Imagine you're a hungry customer waiting for a pizza. Core Web Vitals are like the delivery guy:
Largest Contentful Paint (LCP) is how long it takes the pizza to arrive (ideally under 2.5 seconds, because nobody likes a cold pizza).
First Input Delay (FID) is how long it takes for the waiter to take your order after you raise your hand (under 100 milliseconds, because hangry customers are not patient).
Cumulative Layout Shift (CLS) is how much the table wobbles when they finally bring your pizza (less than 0.25, because nobody wants their toppings flying off!).

A good Core Web Vitals score means your website is a well-oiled pizza delivery machine, while a bad score... well, let's just say it's more like a burnt calzone dropped on your foot.
So, why should you care if your Core Web Vitals fail?
Think of it this way: a slow, clunky website is like a grumpy gremlin guarding your online treasure. Users will bounce faster than a beach ball in a hurricane, and Google will bury your website in the search results like a forgotten anchovy in the back of the fridge.
But don't despair! Here's how to turn that frown upside down (and your Core Web Vitals score):
Image Diet: Those hefty pictures are weighing down your site. Compress them, use modern formats like WebP, and implement lazy loading so they only appear when needed.
JavaScript Detox: Not all JavaScript is created equal. Minify and defer non-critical scripts, and use async or defer attributes to prioritize loading the essentials first.
Server Spa Day: Is your server sluggish? Upgrade your hosting plan, consider a Content Delivery Network (CDN) for global lightning speed, and implement caching to shave off precious milliseconds.
CSS Cleanse: Tidy up your CSS files! Minify and compress them to shrink their size and make your website run leaner and meaner.
Layout Zen: Stop the content from doing the jitterbug! Use fixed-size elements for images and videos, reserve space for ads, and avoid late-loading content that disrupts the flow.
Remember, improving Core Web Vitals is an ongoing journey, not a one-time sprint. Use tools like Google's PageSpeed Insights or Lighthouse to track your progress and celebrate every milestone. Soon, your website will be a sleek, speedy machine that delivers a delightful user experience every time.
So go forth, website warrior, and conquer those Core Web Vitals! With a little effort and these handy tips, you'll have a website that's the envy of the online world, and your visitors will be singing your praises (and maybe even ordering another metaphorical pizza).
What Does Failed Core Web Vitals Assessment Mean?
So, failing any of these core web vitals means your website is either slow to load, unresponsive to user actions, or has a wonky layout that throws users off. This can lead to several negative consequences:
Lower search engine rankings: Google prioritizes websites with good user experience, so a failed assessment can hurt your visibility in search results.
Higher bounce rate: Users get frustrated with slow or glitchy websites and leave quickly.
Lower conversion rates: A bad user experience makes it less likely for visitors to buy, subscribe, or take any desired action.
How does Google measure Core Web Vitals?
1. Real User Metrics (RUM):
This technique utilizes anonymized data from Chrome users worldwide to assess real-world website performance. Chrome collects data on several crucial metrics, including LCP, FID, and CLS, for every page loaded.
This data feeds into the Chrome User Experience Report (CrUX), a vast database available to website owners through tools like Google Search Console. CrUX provides insights into your website's performance based on actual user data, giving you a clear picture of how visitors experience your site.
2. Lab Measurements:
Google also uses controlled environments to measure Core Web Vitals. Tools like Lighthouse and PageSpeed Insights simulate user interactions and page loading under specific conditions to assess performance metrics.
These tools offer valuable insights into potential performance bottlenecks and provide suggestions for improvement. However, it's important to remember that lab measurements may not perfectly reflect real-world user experience, so it's crucial to consider both RUM and lab data for a comprehensive evaluation.
Here's a table summarizing the key aspects of each approach:
| Approach | Data Source | Advantages | Limitations |
| Real User Metrics (RUM) | Actual user data from Chrome | - Reflects real-world user experience - Accurate picture of website performance across diverse devices and locations | - Data may be unavailable for new or low-traffic websites - Can be affected by external factors like internet speed |
| Lab Measurements | Controlled environment simulations | - Quick and consistent testing - Identifies potential performance bottlenecks - Easier to compare results across websites | - May not accurately reflect real-world user experience - Limited by specific testing conditions |
Getting a Google PageSpeed Insights report can be both enlightening and overwhelming. Navigating all the data and metrics can feel like deciphering an ancient manuscript. But fear not, intrepid website warrior! This guide will break down your PageSpeed Insights report into clear, actionable steps.
First things first, the score:
90 and above: You're golden! Sit back and bask in the glory of a speedy website.
50-89: Time for some tweaks. There's room for improvement, but your site isn't a total lost cause.
Below 50: Uh oh, red flags are flying. Your website needs some serious TLC.
Now, let's dive into the details:
1. Opportunities: These are low-hanging fruit, quick fixes that can give your score a noticeable boost. Focus on these first!
Optimize images: Compress those hefty pictures without sacrificing quality.
Minimize JavaScript: Reduce unnecessary scripts and defer the rest for a smoother loading experience.
Leverage browser caching: Store static content locally on users' devices so it doesn't need to be downloaded every time.
Reduce render-blocking resources: Prioritize loading essential elements first to avoid delaying page rendering.
2. Diagnostics: These are deeper-dive insights into potential performance bottlenecks.
Long tasks: Identify scripts or processes that are taking too long to execute and investigate ways to optimize them.
Large contentful paint: See what element is taking the longest to load and find ways to optimize it or prioritize its loading.
Total blocking time: Understand how long users have to wait before interacting with your page and find ways to minimize this time.
3. Passed Audits: Don't let the green flags lull you into complacency. These areas are performing well, but keep an eye on them and ensure they stay optimized.
Remember: PageSpeed Insights is a guide, not a gospel. Focus on improving user experience by making your website faster and more responsive, not just chasing a high score.
Failure to Launch: A Deep Dive into Common Core Web Vitals Misfires
A failed Core Web Vitals assessment isn't just a red flag, it's a flashing neon sign screaming "SOS, slow website in distress!" But fear not, web warriors, for the cause of this distress can be diagnosed and treated. Let's embark on a deep dive into the common culprits behind poor Core Web Vitals performance, equip you with the knowledge to fix them, and set your website back on the path to speed and user satisfaction.
The Big Three Culprits:
1. The Resource Hogs:
Image Overload: Unoptimized images, like JPEGs at full resolution, are massive files that take ages to load, weighing down your site like anchor chains on a speedboat.
Excessive JavaScript: Every script adds weight to your site. Unnecessary scripts, poorly coded ones, and blocking scripts (that delay page rendering) are like uninvited guests hogging the bandwidth buffet.
Third-Party Scripts: Social media widgets, analytics trackers, and fancy ad networks can be valuable, but each adds another script to the party, potentially causing congestion and delays.
2. The Laggy Servers:
Sluggish Hosting: Imagine your website living in a cramped studio apartment with one dial-up connection. Cheap, shared hosting often lacks the processing power and bandwidth to handle demanding websites.
Database Dilemmas: A poorly optimized database can be the bottleneck of your site, struggling to deliver information quickly and efficiently.
Distance Matters: If your server is physically far from your users, the data has to travel a long way, leading to increased latency and slower loading times.
3. The Layout Wobble:
Content Shifts: Imagine you sit down to enjoy a delicious meal, then the table starts dancing and your food goes flying. Layout shifts occur when elements on your page move around after initially loading, disorienting and frustrating users.
Fonts on the Fly: Downloading fonts on the fly can add precious milliseconds to loading times, making your website feel like a slow fashion show.
Missing Dimensions: When elements don't have pre-defined dimensions, the browser has to guess, potentially causing content to jump around as it figures things out.
Beyond the Big Three:
Render-blocking CSS: Certain CSS styles can block page rendering, making users stare at a blank screen while the styles load.
Browser Caching Issues: If browsers don't cache static content properly, they have to download it every time, slowing things down.
Server-Side Issues: Inefficient server configuration or overloaded servers can also contribute to poor performance.
The Fix-It Toolbox:
Now that you know the enemies, it's time to fight back with these handy tools:
Image Optimization: Compress images, use modern formats like WebP, and implement lazy loading.
JavaScript Management: Minify and defer non-critical scripts, avoid blocking scripts, and consider alternatives.
Server Upgrade: Invest in better hosting with more resources and bandwidth.
Database Optimization: Consider database optimization techniques to improve data retrieval speed.
Content Delivery Networks (CDNs): Place your content on servers closer to your users for faster delivery.
Layout Stability: Fix content shifts, preload fonts, and define element dimensions.
Optimize CSS: Minimize render-blocking CSS and consider critical rendering path optimization.
Caching: Configure caching properly to avoid unnecessary downloads.
Server-Side Tweaks: Investigate and address any server-side performance bottlenecks.
Improve Largest Contentful Paint (LCP)
Improving your Largest Contentful Paint (LCP) is crucial for a snappy website and happy users. Here are some actionable steps you can take:
Prioritize the LCP element:
Identify the LCP element: This is usually the largest image or text block on your page. Use PageSpeed Insights or Lighthouse to see what element is considered the LCP.
Optimize the LCP element itself: For images, use efficient formats like WebP, compress them effectively, and consider lazy loading if it's below the fold. For text blocks, avoid large fonts and unnecessary styling.
Reduce rendering time:
Minimize render-blocking resources: Scripts and stylesheets that block rendering should be deferred or made asynchronous. Tools like Lighthouse can help identify these.
Optimize critical CSS: Inline critical CSS or use techniques like critical rendering path optimization to prioritize loading styles needed for the initial viewport content.
Reduce DOM size: Simplify your HTML structure by minimizing unnecessary divs and nested elements.
Improve server response time:
Upgrade your hosting plan: If your server is slow, it will take longer for the LCP element to load. Consider upgrading to a plan with more resources or using a Content Delivery Network (CDN) for faster delivery from geographically distributed servers.
Optimize database queries: Inefficient database queries can slow down your server. Consult a developer to optimize your database queries.
Enable server-side caching: Cache static content like images and scripts on your server, reducing the load on your server and speeding up delivery.
Preload key resources: Use the
rel="preload"attribute to tell the browser to prioritize downloading critical resources like the LCP image before other elements.Use browser caching mechanisms: Set appropriate cache headers to tell browsers to cache static content locally, reducing future downloads.
Monitor and track your progress: Regularly use tools like PageSpeed Insights and Lighthouse to track your LCP performance and identify areas for further improvement.
Reduce First Input Delay (FID)
First Input Delay (FID) can be the difference between a delightful user experience and a frustrating click-and-wait game. Let's dive into some tactics to minimize FID and make your website feel lightning-fast!
Prioritize JavaScript execution:
Minimize JavaScript: Analyze your scripts and remove any unnecessary ones. Aim for a lean and mean script library.
Defer non-critical scripts: Scripts not vital for initial rendering can be deferred or loaded asynchronously, avoiding blocking important interactions.
Minimize third-party scripts: Every external script adds weight. Consider alternative solutions or optimize their loading.
Optimize resource loading:
Reduce render-blocking resources: Identify CSS and JavaScript that block page rendering and defer them or use preload strategically.
Preload key resources: Tell the browser to prioritize loading critical resources like fonts and scripts needed for early interactions.
Minimize DOM size: Keep your HTML structure clean and efficient. Avoid unnecessary nesting and divs.
Boost server performance:
Upgrade your hosting plan: A sluggish server can significantly impact FID. Consider a plan with more resources or leverage a Content Delivery Network (CDN) for faster delivery.
Optimize database queries: Inefficient database queries can slow down server response times. Optimize them for faster data retrieval.
Enable server-side caching: Cache static content like images and scripts locally on your server to reduce server load and improve responsiveness.
Use browser caching mechanisms: Set appropriate cache headers to tell browsers to cache static content locally, reducing future downloads.
Monitor and track your progress: Regularly use tools like PageSpeed Insights and Lighthouse to track your FID performance and identify areas for further improvement.
Consider using a JavaScript framework: Frameworks like React can help handle DOM manipulation and state management efficiently, potentially improving FID.
Minimize Cumulative Layout Shift (CLS)
Imagine a peaceful picnic, then a sudden earthquake: That's CLS. It's when elements on your webpage unexpectedly shift after loading, causing frustration and accidental clicks.
Here are key strategies to minimize CLS and keep your content as stable as a rock:
1. Reserve Space for Images and Videos:
Specify width and height attributes: Tell the browser exactly how much space to allocate, preventing content jumps.
Example: HTML
<img src="image.jpg" width="400" height="300">Use code with caution. Learn more
2. Preload or Preconnect Fonts:
Avoid layout shifts caused by font loading delays.
Preload: Download fonts as soon as possible.
Preconnect: Establish early connections to font servers.
Example (preload): HTML
<link rel="preload" href="font.woff2" as="font" type="font/woff2" crossorigin>Use code with caution. Learn more
3. Avoid Dynamically Inserted Content Above Existing Content:
Don't inject content above existing elements: It pushes everything down, causing shifts.
Load content below or use placeholder elements.
4. Minimize Ads and Widgets That Reposition Content:
Choose ad layouts that respect content space.
Lazy load ads or place them strategically.
5. Animations and Transitions:
Use CSS animations and transitions for smooth changes.
Avoid abrupt JavaScript-induced shifts.
Additional tips:
Use fixed-size elements when possible.
Minimize the use of
width: autoorheight: auto.Avoid excessively large DOM changes.
Delving Deeper into WordPress Optimization with Autoptimize:
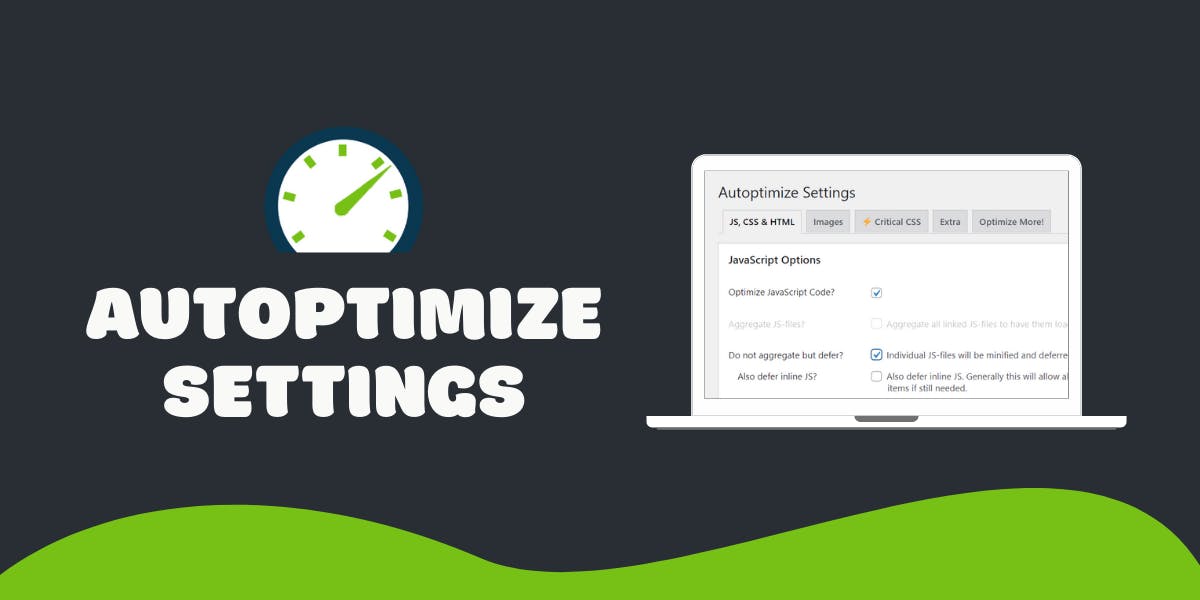
Autoptimize is a powerful tool in the WordPress optimization arsenal, but it's not just about flipping switches and hoping for the best. Let's delve deeper into the specific ways it can enhance your website's performance:
1. Code Minification:
HTML: Autoptimize removes unnecessary whitespace, comments, and attributes, reducing file size and improving loading times.
CSS: It shrinks CSS files by removing redundancy and whitespace, making them download faster.
JavaScript: Similar to CSS, Autoptimize compresses JS files, leading to quicker execution.
2. Asset Aggregation:
CSS and JavaScript: Autoptimize combines multiple CSS and JS files into fewer requests, reducing HTTP overhead and speeding up page load.
Fonts: It can optimize font delivery by preloading crucial fonts and optimizing their weight, ensuring a smooth visual experience.
3. Image Optimization:
Lazy Loading: Images only load as users scroll down, saving bandwidth and preventing unnecessary pre-loading.
WebP Conversion: Autoptimize can convert images to the next-gen WebP format, significantly reducing size without compromising quality.
4. Caching:
- Browser Caching: Autoptimize instructs browsers to cache static files like images and scripts, reducing server load and improving subsequent page loads.
5. Advanced Techniques:
Critical CSS Inline: Autoptimize can identify and inline the essential CSS needed for immediate rendering, ensuring a fast visual response.
CDN Integration (Pro Version): Connect your website to a Content Delivery Network (CDN) for geographically distributed content delivery, further reducing latency.
Here's a guide to optimizing your WordPress website using the Autoptimize plugin:
Installation and Activation:
Access your WordPress dashboard. Navigate to Plugins > Add New. Search for "Autoptimize" and click "Install Now." Activate the plugin.
Basic Settings:
Go to Settings > Autoptimize. Check the boxes for "Optimize HTML Code," "Optimize JavaScript Code," and "Optimize CSS Code." Enable "Aggregate JS-files" and "Aggregate CSS-files."
Advanced Settings (Optional):
"Optimize Images": Compress images automatically. "Defer Render-Blocking JS": Improve perceived load time. "Exclude Scripts": Prevent specific scripts from being optimized. "Exclude CSS": Exclude certain CSS files. "Minify HTML": Further reduce HTML size. "Try-Catch Wrapping": Improve compatibility.
Experiment and Fine-Tune:
Test different settings and observe performance changes. Clear your browser cache after each change. Use tools like PageSpeed Insights to measure performance. Adjust settings based on your website's specific needs.
Remember:
Testing is Key: Every website is unique. Test different Autoptimize settings and monitor performance using tools like Google PageSpeed Insights to find the optimal configuration.
Balance is Crucial: Don't over-optimize. While Autoptimize offers powerful tools, ensure your website remains functional and user-friendly.
Pro Tip: Consider the Autoptimize Pro addon for advanced features like automatic critical CSS generation and CDN integration.
Further Exploration:
Autoptimize Documentation: https://wordpress.org/plugins/autoptimize/
Optimizing WordPress with Autoptimize: https://kinsta.com/blog/autoptimize-settings/
WordPress Performance Optimization Guide: https://make.wordpress.org/performance/
By understanding these mechanisms and applying them strategically, you can turn Autoptimize into a powerful ally in your quest for a lightning-fast and user-friendly WordPress website.